In the past decade, the pool builder's art has been lifted to new heights, as more projects have come to include fancy rockwork, waterfalls, vanishing edges, free-form shapes, attached spas and multiple-level architecture, just to name a few of the creative options. These features, in the hands of talented and inspired designers, continue to astonish homeowners and adorn the pages of glossy magazines.
In at least one practical sense, however, they can be a burden. For homeowners looking to install a well-fitting and attractive cover to keep the pool safe and clean, these same beautiful features can add difficulty to the covering process.
Dimensional Accuracy
First and foremost, getting a good fit on a cover requires an accurate dimensioning of the pool and all its surrounding features, especially if it's a new one, not a replacement. These measurements are all the manufacturer will have to go by in putting the cover together, and if they're off, that same fate will befall the cover.
Begin with a detailed description of the perimeter of the pool, says Kevin Shea, president of VynAll, Newmarket, N.H.
"It is important to start by checking if the pool is square — and not bumped 'out-of-square' — as this could affect the design and placement of the safety cover," he says. "Be sure to check that the pool is square before giving dimensions to your safety cover manufacturer. This will help them determine strap placement and help you install the cover so it looks good in place."
For regular-shaped pools such as rectangles or ovals, determining measurements is fairly straightforward, but for complex shapes and those with intruding rockwork or irregular features, the A-B triangulation method is required.
"The A-B method uses triangulation to determine the shape of the cover and all obstructions. Points are marked on the pool perimeter at a maximum of 3-foot intervals and at all obstructions. A freehand sketch showing the pool and A-B line, cross-dimensions and any special notes concerning obstructions and/or deck must also be included. Complete instructions and examples can be found on the cover manufacturer's measuring form," said Maryellen Comitino, global accounts director and Amelia Chiaramonte, sales manager, in a joint response from LOOP-LOC, Hauppauge, N.Y.
Despite the seeming simplicity of the concept, it's easy to get something wrong in the A-B process. For instance, stakes driven into the ground as reference points can easily wiggle out of position, especially if left in place for a time and then used to re-check measurements later. Another easily made mistake is to take measurement points around the pool in the wrong direction. If the measurements are taken in a counter-clockwise direction when the manufacturer is expecting clockwise, you end up with a perfect mirror image of the pool.
"One of the more common measuring mistakes we find," adds Comitino and Chiaramonte, "is establishing the A-B baseline too close to the pool. The A-B line should be at least 3 feet away from the closest point on the pool perimeter. However, with irregularly shaped pools and Lazy-L's, the measurer needs to sight all the way down the line to be sure that no part of the imaginary extensions of the baseline are closer than 3 feet away from the pool. Of course, not providing complete measurements is always an issue. We stress the importance of including the distance between points 'A' and 'B' and cross-dimensions."
One way of helping to keep things straight is labeling each point, which also allows them to be confirmed easily on a second inspection and can even help with installation. Some installers will use chalk for this purpose, which works well in a lot of applications, but at times it can put fine decking materials at risk, notes Gary Tripp, president of Tripp Construction, Raymore, Mo.
"I get nervous when labeling my points on expensive stone that might be easily stained," he says, "so I have a bunch of blue 'painter's tape' in my bag of measuring tools. I used to be a big fan of duct tape — but found that the glue can come off when heated by the sun and then I can spend hours removing the residue from the deck."
Careful, Now
An excellent safeguard against a mistake in the ordering process is a quick set of photographs of the pool. Even cheap phones nowadays have photo-taking capability, and a digital camera sufficient for this purpose can be had for less than $100 and tossed into the glove box of a truck for use in just these situations. It's a small price to pay for insurance against a cover that doesn't fit, and it only takes a few minutes to walk around the pool and snap a few pics.
"Many questions, and delays, can be avoided simply by supplying photographs of the pool," note Comitino and Chiaramonte. "Close-ups of raised walls, obstructions and an overall view of the entire pool can give the manufacturer details that may have been overlooked in filling out the measure form — such as the type of deck, whether there is limited deck space, and the height of rocks located along the coping line."
Another prudent measure against error is the point-plotting computer program many manufacturers offer, which allows dealers to enter measurements and check their work. It helps the installer discover any mistakes made in measuring and if there are areas that perhaps they should look at again. The installer can look at the pool he or she has specified with the points recorded on screen, and see if it matches the pool to be covered. If it does, the points are good.
"Measuring the perimeter of special features is also helpful to the manufacturer," adds Shea. "Be sure to measure around spas and other raised features and provide these to the manufacturer of the cover so they can be sure the cover is made correctly. I always tell pool professionals that making safety covers is like making a suit. Safety cover manufacturers are like tailors; with good measurements we can make a safety cover that will fit great and look great. With bad measurements you get a bad looking, ill-fitting safety cover."
Getting In Position
Ladders, slides and other types of obstacles require cutouts in the cover for accommodation, and this makes installation more interesting. It's best to get the cover in perfect position before drilling anchor holes, and that positioning should begin with the cutouts or notches in the cover. Once these areas are all lined up, work the rest of the cover into the correct position.
Only when the cover is perfectly in place should the installer start to contemplate anchor holes. "Even if the measurements tell us to drill in a particular space," says Tripp, "we find ourselves 'adjusting' where we put the anchor so that the straps layout 'straighter' and look better."
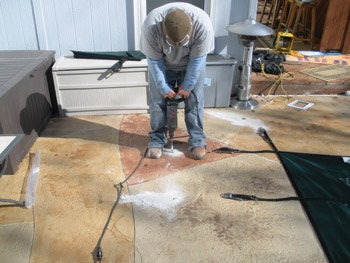
With elements that present a sheer wall face, such as a raised spa or rockwork that rises above the surface of the pool, eyebolts must be installed in the wall and the cover attached by cables. In these situations, Shea notes, a common mistake is to use too few eye-bolts, especially where there is a radius in the cover.
"If installers use too few eye bolts," he says, "they are likely to get puckers and gaps in the cover, perhaps even large enough to cause a safety hazard. Because the cable is threaded through the eyebolt and the cover is pulled tight up against the feature, not enough eyebolts will cause the cover to bunch around the feature. This can allow debris to get under the cover, not to mention the safety of the cover could be compromised. No installer wants to drill too many anchors into a feature, but there should be enough to ensure the cable can pull up flush and tightly around the feature."
If the wall is a straight vertical wall, Shea adds, in most cases, there is no need to use a cable anchoring system on the wall. The clips underneath the cover can clip directly into the eyehooks on the wall.
Covering Art
The prospect of covering a pool is unlikely to cross today's designers' minds as they visualize and imagine and move features around on a computer screen, but ultimately, the artistic combinations they create are often covered by a carefully measured, and meticulously installed cover.
With care taken to keep reference points secure and A-B points well ordered, and the cover snug around obstructions, a tidy and functional shield against debris and unwanted access can be ordered and quickly installed.
Comments or thoughts on this article? Please e-mail [email protected].


