Like all contracted work, vinyl replacement begins with a customer considering, "Is it time for a new liner?"
A few factors should aid the deliberations.
Age is the primary driver of liner replacement, notes Kevin Shea, senior vice president and CEO, Vyn-All and Plastimayd Pool Products, Newmarket, N.H. Shea is the founder of Vyn-All and an expert in the field, with years of instruction in replacement techniques under his belt.
Today's vinyl liners reach the end of their useful lives in eight to 10 years, he says. In some northern climes, where the depredations of the sun are less intense, an owner may get as many as 12. Subtle signs of age will appear in this time frame and wordlessly suggest replacement to the owner, or just as likely, leaks due to weakening of the vinyl will raise the issue very prominently.
But as Ted Hebert, Teddy Bear Pools and Spas, Chicopee, Mass., points out, sometimes it's just the flat, dull appearance of sun-faded vinyl that prompts a pool owner to act.
In a small percentage of cases, but not often, he says, a customer may feel a mistake was made in the original pattern selection. "But there are very few people who will change their liner because they want a different pattern."
Taking The Measure
Whatever the reason for replacement, with funding for the project approved, the first step is taking measurements and ordering the liner.
Draining should be put off for the very last minute, and most of the time it's easy enough to find the dimensions with the water still in the pool, although there may be cases where that's difficult or impossible. "It may be a pool that hasn't been treated for years," notes Shea, "and you can almost walk across on the algae. In a case like that, you've got to drain the pool just to get your measurements."
If it's a manufactured pool, knowing the brand and model of the pool makes this part easy, adds Hebert. "If you know that, you can call the manufacturer and to get the shape of the pool, length of your shallow end, length of the flat part on the bottom and length of the slope going to the back wall."
The liner manufacturer will take these dimensions and form material to the shape of the pool. It's important to inform the manufacturer what time of year the liner will be installed, as liners are made with different measurements for different installation conditions.
Most liner companies will make a liner that's larger and fuller during the fall, winter and early spring months than at the peak of summer. This is because the ambient temperature and intensity of the sun have an effect on what happens during installation.
"The material becomes very pliable with exposure to heat and especially sunlight," Shea says. "You'll get a completely different reaction on a 70-degree sunny day than on a 70-degree overcast day. You can easily end up with too much perimeter, because during the installation the installer unknowingly can be stretching the liner as he's putting it into the track, and he gets to the end of the track and he's still got six inches of perimeter liner and nowhere to put it."
Good judgment is the key here. If the liner was ordered for an early spring installment, and the scheduled installment day feels more like mid-summer, a change in plans is in order.
"Those kinds of things rest with an installer," Shea says. "If you've got a blistering hot day, you're better off waiting and going first thing in the morning while it's still cool, or coming back late in the afternoon and avoiding peak temperatures and sunlight."
Draining And Dumping
The water has to come out first. Some dealers pump the water out of the pool into big bladders, saving not only the pool water but the heat and chemicals in it.
"Of course, the situation has to allow it," Shea says. "If you're on the side of a hill, well, you really don't want to see 9,000 gallons of water (in the form of a 36-ton bowling ball) rolling away. I've heard stories where that's happened. Something like that will mow down everything in its path."
Another option is to put up an above-ground pool to hold the water. Hebert has tried this in the past but found the cost in terms of time and expense prohibitive. Still, as commodity prices continue to rise and conservation efforts take hold, the case for such measures may become stronger.
High Water
In areas where the groundwater level around the pool is high, installation is a bit more complicated. With some luck, the previous builder has provided a nice drainage system with a bed of crushed stone and a drainpipe, to which a pump may be attached to keep the bottom dry enough to proceed.
If that is not the case, Shea recommends waiting until groundwater has subsided, or even building a proper drainage system on the spot.
Or, you can try to beat the clock.
"Some guys," Shea says, "will put a submersible pump in the bottom of the pool while they are working on it to keep up with the water that's coming in. And then at the very last minute, when they're putting the liner in, they'll take it out and go like blazes to get the liner in and water in the pool before the water table comes up. I don't exactly recommend that, but I've seen guys do it."
Before the new liner can go in, the bottom of the pool must be repaired if necessary, and left smooth and clear of any debris. Anything left behind can pose a problem later. An object with sharp edge like a dropped screw can damage the new liner that will soon be pressing down upon it with great force. Even if the liner is not at risk, small ridges will be formed in the liner around any object left on the bottom. These may not even be visible during the day, but when a pool light is switched on at night, every imperfection in the bottom will be easily apparent.
With touch up and repair finished, an airtight seal around the pool should be created in preparation for installation and vacuum positioning. Duct tape or caulking at the panel joints and around the coping should do the trick. Gaskets and faceplates should also be replaced during installation of a new liner, and it's a great opportunity to make sure all is well with the circulation system, notes Hebert.
"We always pressure test the plumbing at this time," he says, "so if there's a problem, we can repair it before we put the new liner in. It's easier to do at that point, and you don't want to put a new liner in and then see a leak in your pool and think, 'I got a bad liner,' when it might be in your plumbing."
Installation Begins
If there are steps to be covered by the liner, begin installing the liner at the bottom step. Fasten the liner to the intersection of the tread and riser, working your way up. It's important to begin at the steps, Shea notes, because "there is hardly any tolerance for being off left or right. So rather than installing the rest of the liner and hoping when you get to the stairs it's positioned perfectly, it makes much more sense to install the steps and secure that portion first."
The shallow end follows; the corners of the pool are carefully aligned with the liner as the bead is pressed into the track. Again, take note of the ambient conditions. If it's hot, there may be additional perimeter material due to expansion and the liner bead should be compressed as you install it. For cooler conditions, the converse is true, and the bead may be slightly stretched as it is pressed into place.
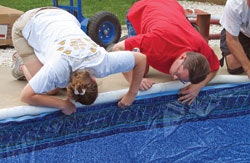
With the bead in place, inspect again to make sure the material is unwrinkled along the wall. If there are wrinkles, now is the time to adjust the material before starting the vacuum.
When everything is smooth, a commercial vacuum is inserted between the liner and the pool wall to suck out the air between them, so the liner fits like a glove. "The vacuum simulates the liner being filled with water by pulling it down into place instead of the water pushing it down into place," Shea says.
Do not shut down the vacuum for any reason until the pool is filled. If the vacuum tension holding the liner in place is relaxed before the water takes over, Shea says, "the liner gets to do what it wants to do, and nine times out of 10 it won't seat the way it's intended to fit. And you'll end up with a bunch of wrinkles."
The vacuum process is a simulation to allow liner adjustment before the pool is filled with water. So once the liner has been sucked tight to the walls and floor of the pool, the wrinkles should be gone. If any do remain, they should be worked out, taking care to place cardboard or some kind of barrier between shoes and vinyl to prevent scuffing the print.
During the filling process, with some water tension on the liner, Hebert's crews attach faceplates. "You do not put your faceplates on until the water is at least 6 inches to a foot deep in the shallow end," he says. "If you go to put your faceplates on the wall, and put the screws in, with the water still down in the deep end, even with the vacuum sucking it tight, you still might get some pulling and wrinkles around your face plates."
Once the pool fills, the uniform water pressure may force some wrinkles flat. On the other hand, that same force will just as often make an existing wrinkle difficult or impossible to adjust, so the work-smart solution is to smooth these out when the pool is empty.
Follow-Up
Having given the pool a new lease on life, all that remains is good customer follow-up. With the customer already resigned to a large expenditure on a pool that is likely at least eight years old, it's a good time to suggest upgrades elsewhere.
"Maybe they have an older filtration system or an older pump, maybe they want an automatic chlorinator," says Hebert.
Having done a professional job on a critical pool component, it's the perfect time to bind the customer into the dealership. "We leave a water bottle with them which they can use to bring a sample in to the store to check their water, along with a letter which entitles them to 10 percent off anything they buy on that trip," he says. "That way, you're using the liner replacement to drive business to your store."


